
An introduction to Bitfinex
Bitfinex is one of the most advanced crypto exchanges in the world. Built with cutting edge technology, Bitfinex is the world’s largest trading platform for bitcoin against USD pair by volume. Besides that impressive accomplishment, BitFinex also allows trading of diverse altcoins on its exchange.
Bitfinex has recently dropped the minimum equity requirement of $10,000 to start trading on its platform by 100 percent with a vision to cater to all types of traders, including institutional and retail investors.
Bitfinex at its Core
In addition to the Spot Trading platform, Bitfinex also offers margin trading as well as margin funding platforms where traders can get leverage on their assets and earn passive income by lending their digital assets on Bitfinex’s P2P finance market place respectively.
According to CoinMarketCap, Bitfinex accounts for a 24-hour trading volume worth 28,747 BTC (as of writing) collectively in all trading categories. High trading volumes at Bitfinex are the direct outcome of the highly scalable interface of the platform built by a group of experts dedicated to improving the trading experience in the crypto space. Bitfinex also allows traders to deposit fiat directly and start trading crypto on its platform, and it houses a variety of altcoins in 128 active markets.
How can you leverage the Bitfinex platform for crypto trading? Here’s a step-by-step guide to help.
Step 1: Open an Account with Bitfinex
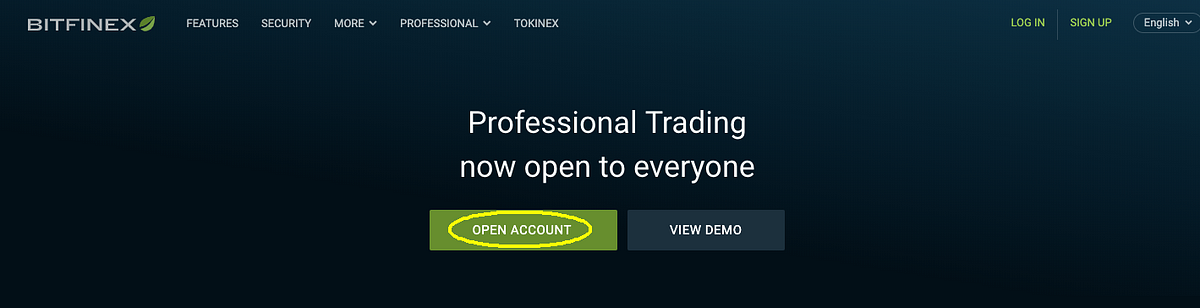
As is the case with every trading platform, you have to open an account with Bitfinex to start trading. To do that, visit Bitfinex’s homepage and click on “Open Account.”
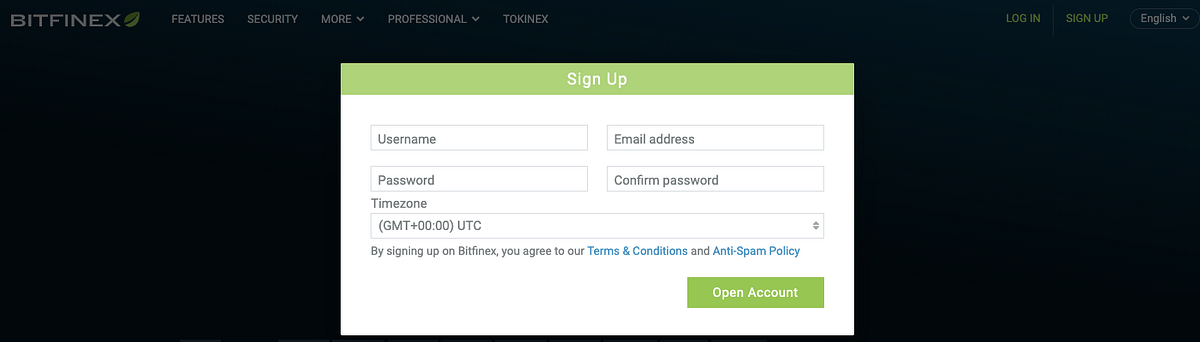
Once you do that, the following pop-up appears. Choose a username and create a password for your account on Bitfinex.
Note: Choose a password with a combination of characters, numbers, and special characters to ensure the security of your account.
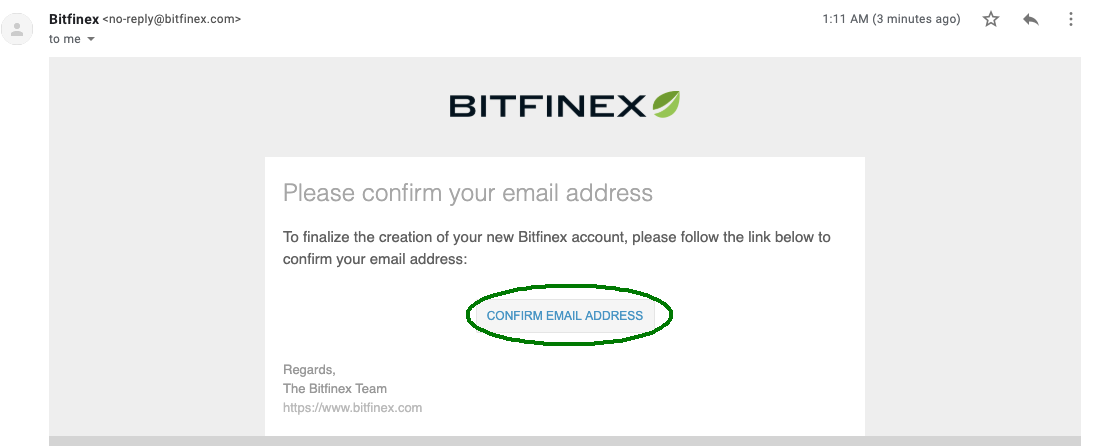
Once you enter the basic details and click on open account, Bitfinex sends a verification mail to your mailbox. Verify your mail ID by clicking on Confirm Mail Address.
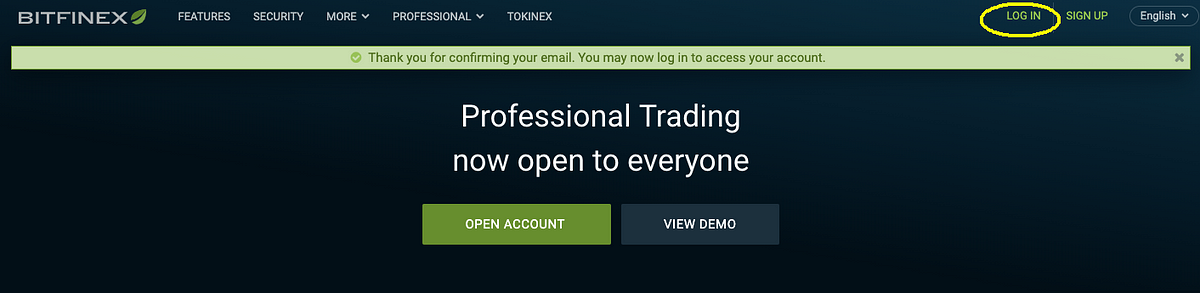
You will be directed to the Bitfinex homepage after clicking the Confirm Mail Address option in your mail. Once you are on the homepage, you will have to log in with the credentials that you’ve chosen in the earlier part of this step by clicking on the Login button on the top right corner of the homepage.
Step 2: KYC Approvals on Bitfinex
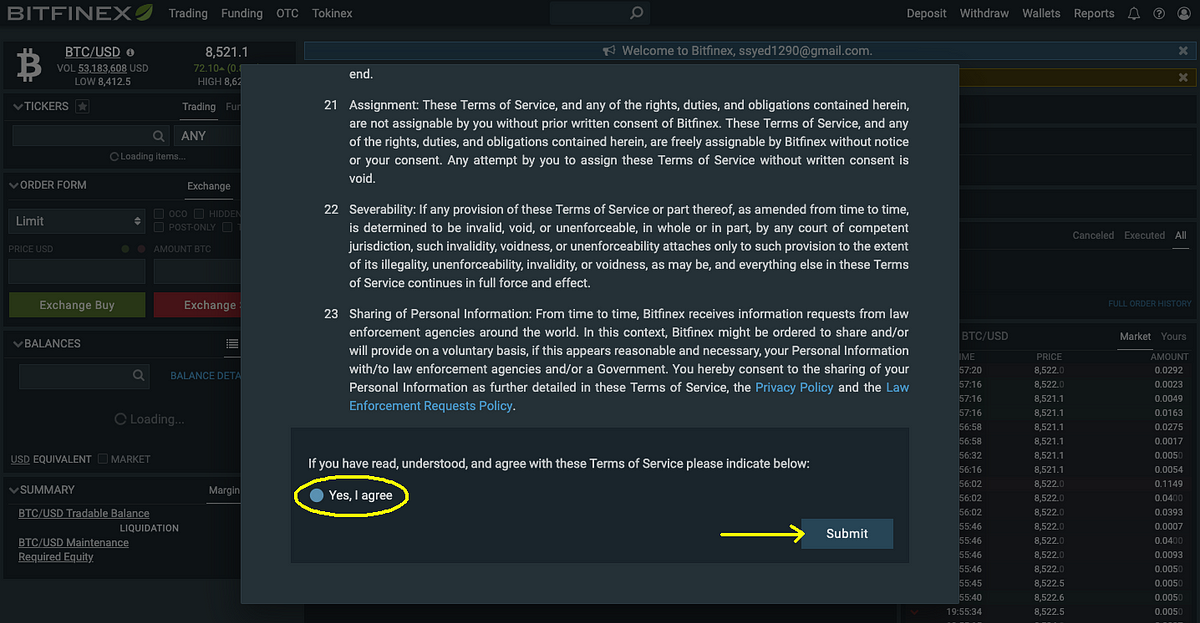
Once you login to your Bitfinex account by entering the credentials you’ve chosen in step 1, you will be asked to agree to Bitfinex’s terms of service and then click on Submit.
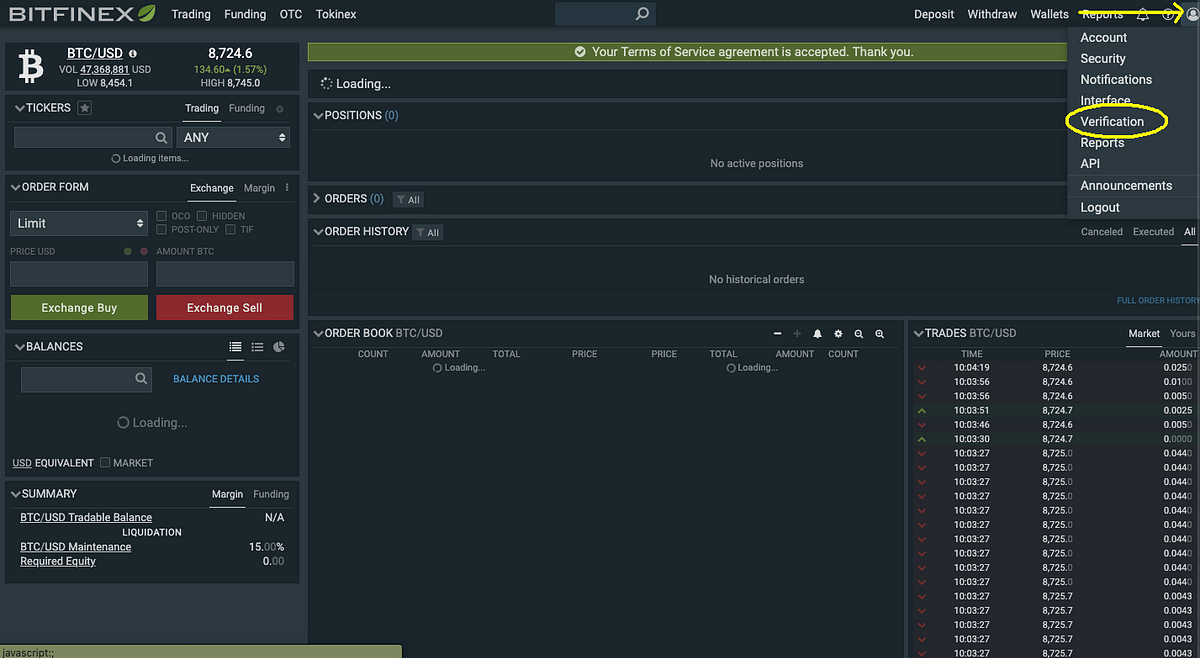
It is only after completing the verification process that you can leverage Bitfinex’s trading platform to its fullest potential by unlocking all the features like withdrawals, deposits, and buying crypto with fiat. To do so, navigate to the top right corner of the trade page and click on the Manage Account icon and select Verification from the drop-down menu.
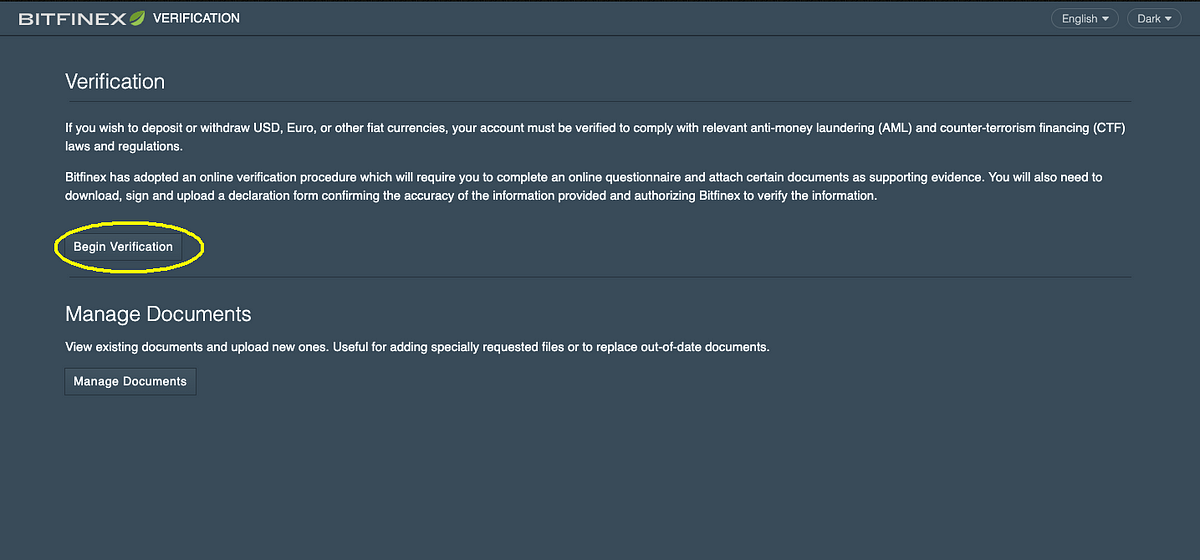
As soon as you click on the verification button, you will be directed to the following page where you’ll select Begin Verification.
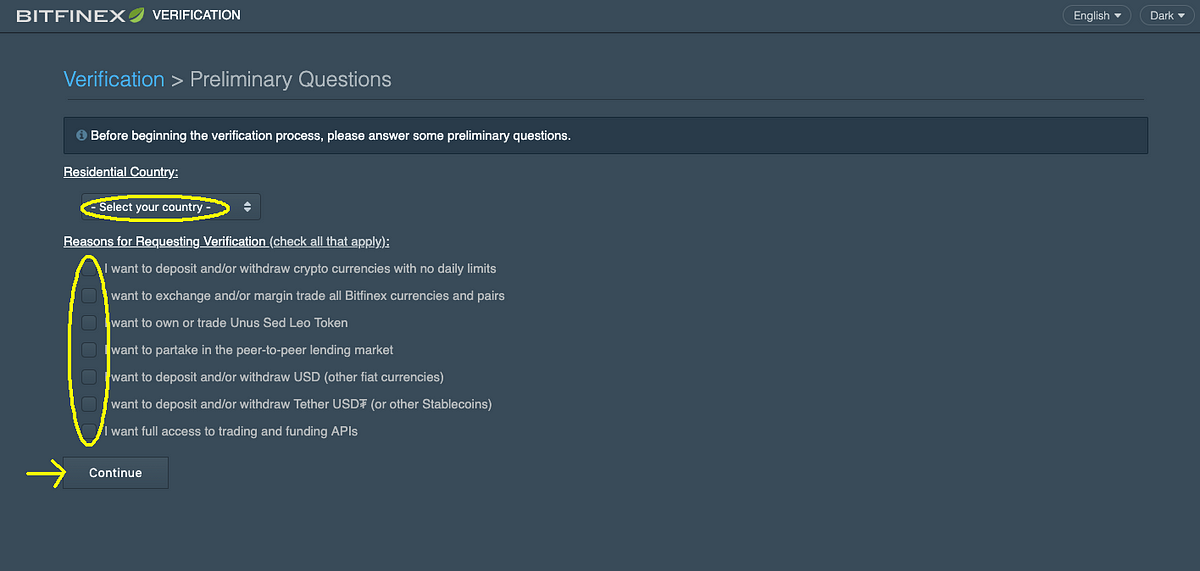
Now you’ll be directed to a page where you will select all the features you want to unlock on your account after selecting the Country of Residence. Then, click Continue.
Then you will be asked to comply with the Verification Process of Bitfinex. Usually, it takes 6–8 weeks to complete the process from Bitfinex’s end. Once you finish complying, you will be asked to choose the type of account you want to create. Here you select Individual Account as this tutorial is focused on setting up an individual account.
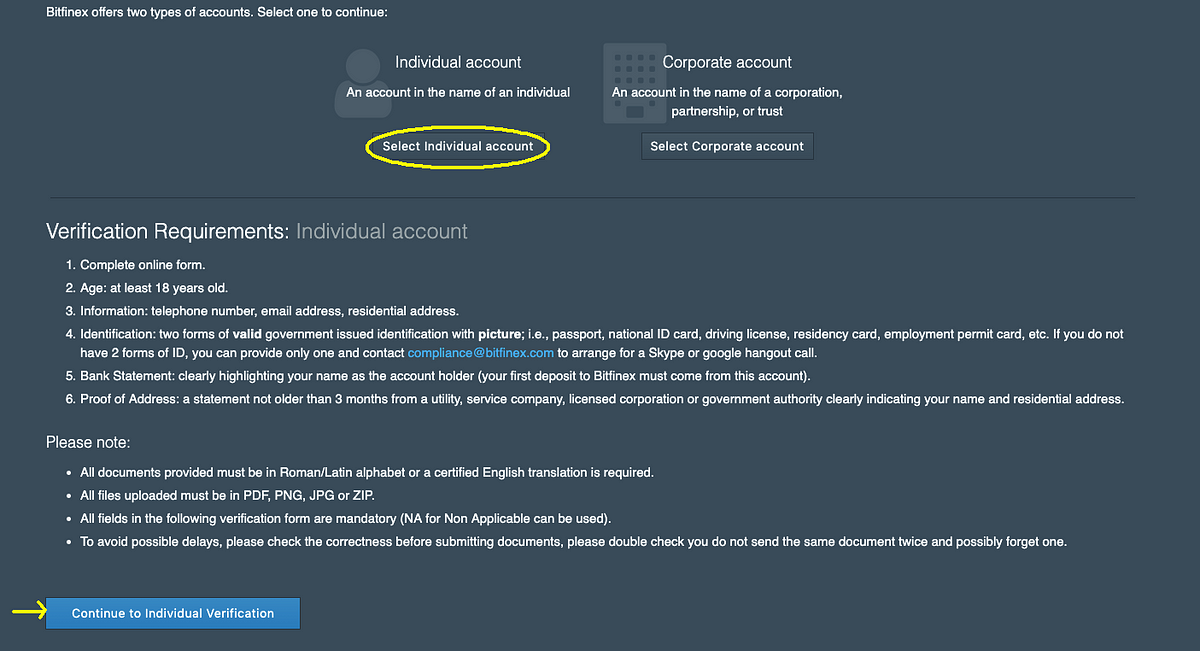
Once you click Continue to Individual Verification, you will be directed to a page where you have to upload the documents proving your name, contact information, identity, financial background (bank statements) and KYC declaration form. All you have to do is to upload the respective documents and wait for the Bitfinex team to complete the process.
Step 3: Setting up Security Features on Your BitFinex Account
Bitfinex is a one-of-a-kind crypto exchange where a user is allowed to set up a number of additional security features to ensure the safety of their funds.
Security recommendations by Bitfinex are outlined below:
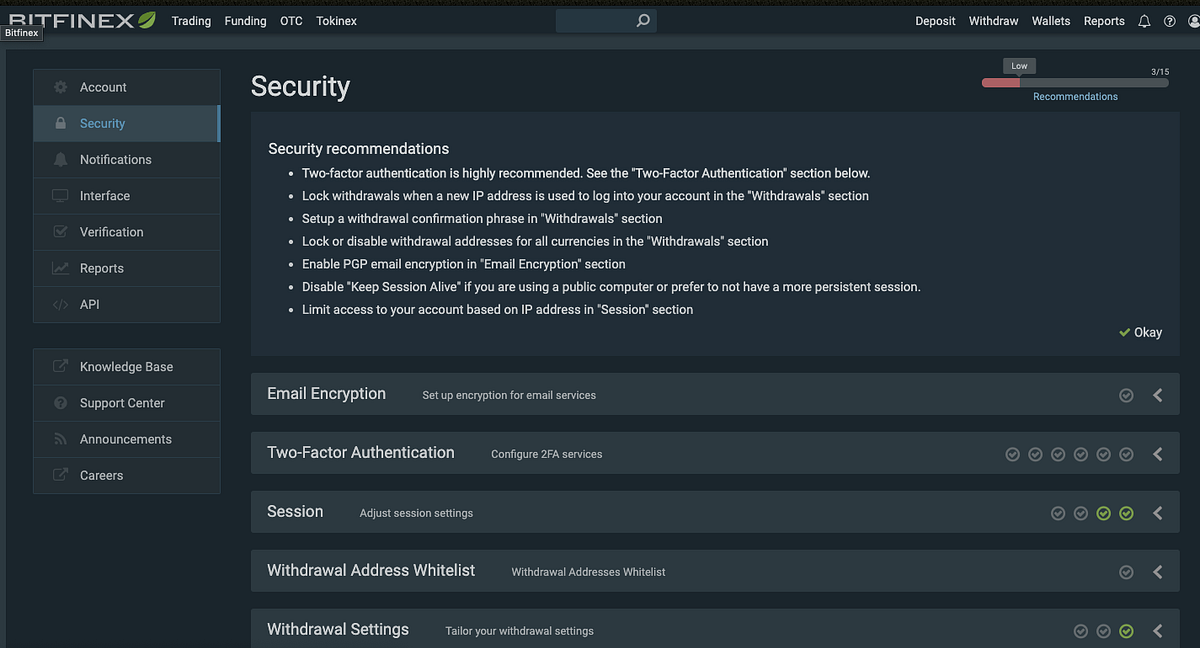
As a bare minimum, it is recommended to have at least 2FA set up on your account. To do so, select Two-Factor Authentication in the menu and select set-up Google Authentication.
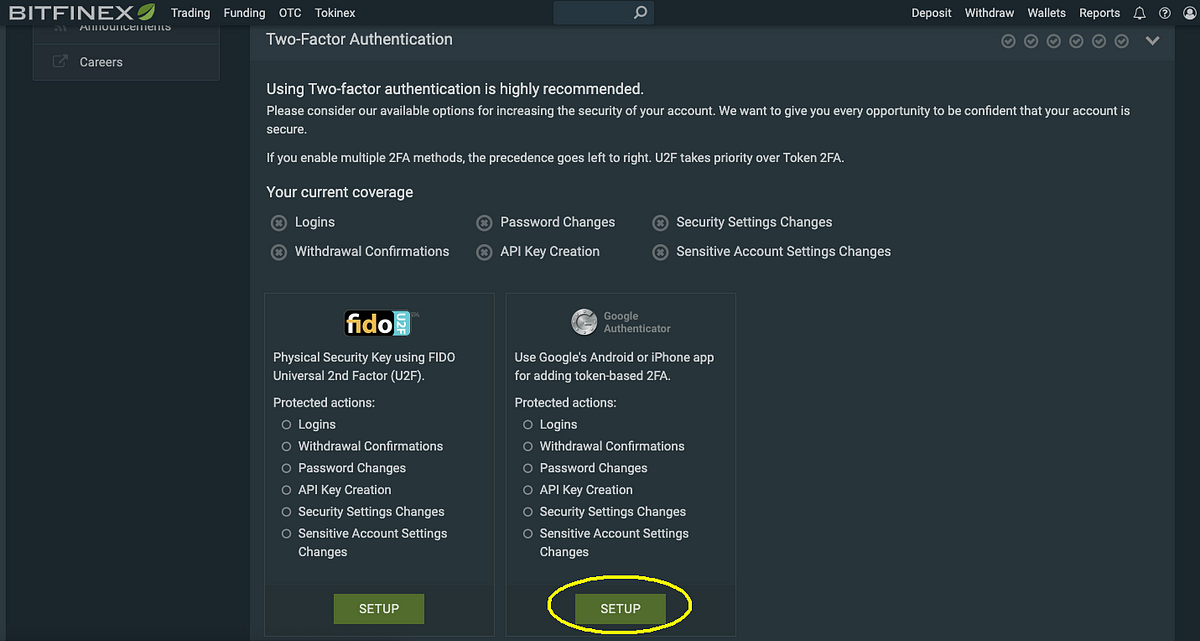
Then you will be seeing a pop-up with a QR code. Scan it via your mobile device, and it will generate a unique token number that you will have to enter in the 2FA Token box shown in the pop-up.
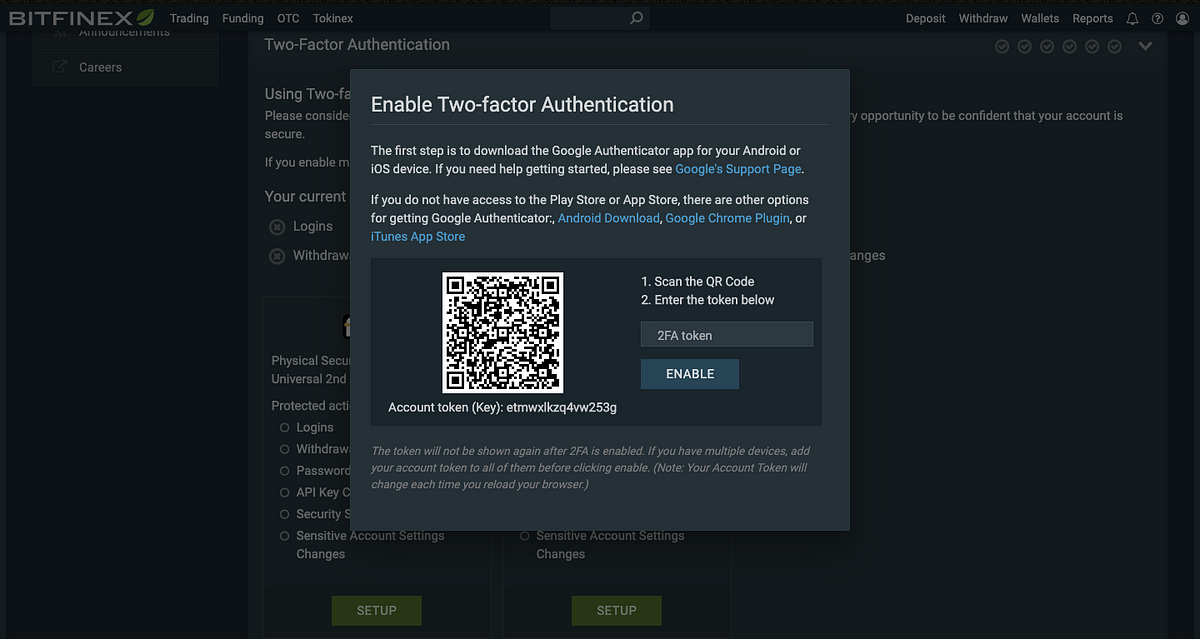
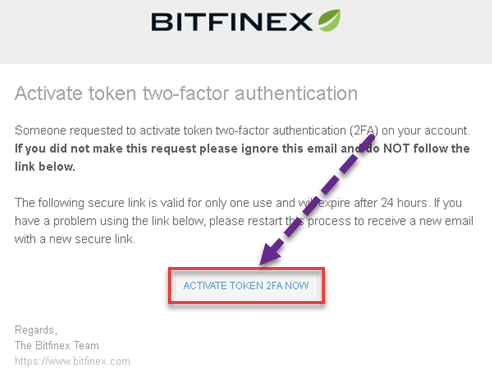
After entering the code you will also have to verify the 2FA set up by accessing your mailbox. Once you finish this, you are done with setting up a 2FA for your account.
Step 4: Funding your BitFinex Account
To fund your Bitfinex account, hover over the Deposit button on the top menu bar on Bitfinex’s homepage.
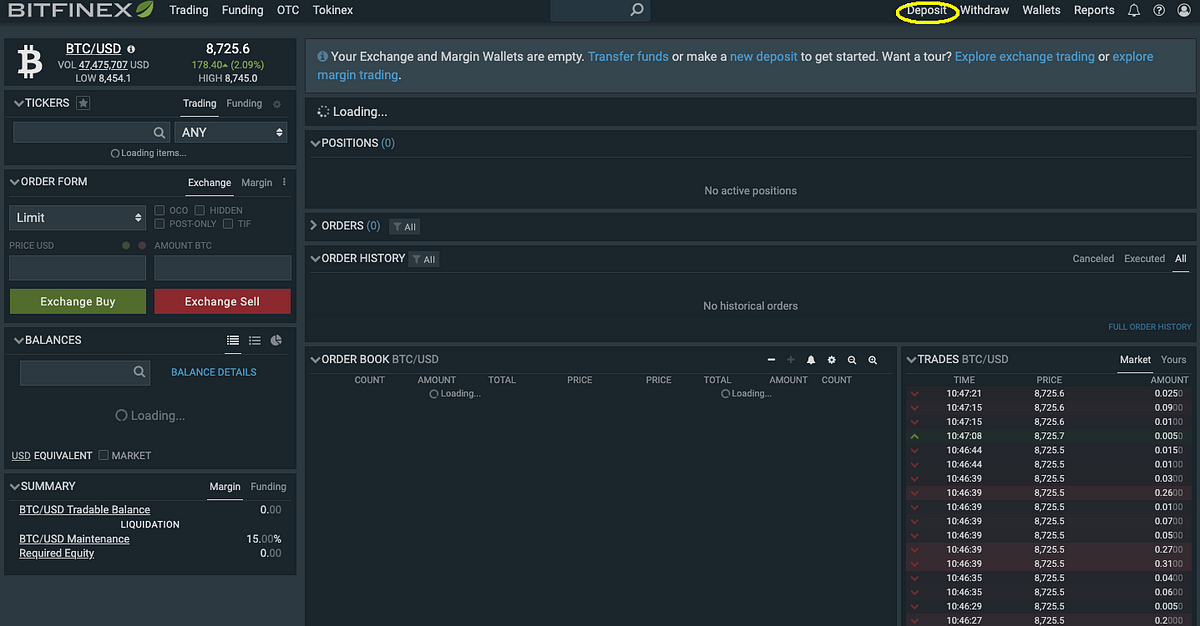
Bitfinex allows its users to deposit funds mainly in two ways; adding fiat using a bank transfer or transferring your crypto assets from other exchanges to Bitfinex’s wallet.
To add fiat using bank transfer, it is mandatory to have completed your verification process both by the user and Bitfinex.
Assuming that you have completed your verification process and you want to buy crypto using fiat, select the type of fiat currency that you want to add to your Bitfinex account using bank transfer.
The bank transfer process is the same as the traditional wire transfer process. After the deposit is confirmed by the bank, the respective amount will appear in the ‘Balances’ section on the left panel of the trade screen.
Step 5: Start Trading on Bitfinex
Now that you have successfully funded your Bitfinex account with fiat (assuming USD), you are all set to start trading crypto on Bitfinex.
To do that, click on the Trading button placed right beside Bitfinex’s logo on its homepage.
Let’s buy Ripple (XRP) coin to understand the trading process on Bitfinex.
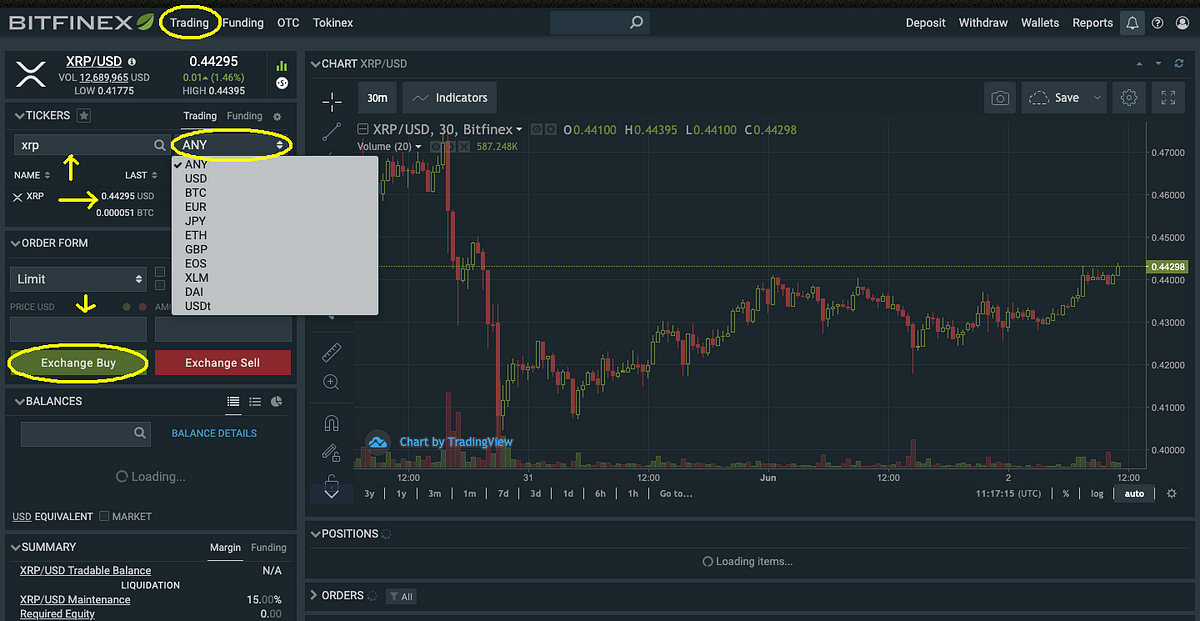
Once you click on the Trading button beside Bitfinex’s logo, you will see the above screen. In the right panel, the first option shown is Ticker. In the box below this ticker option, you will have to type the token ticker of Ripple coin i.e, XRP and press Enter.
Then the panel below expands and shows the market options from which you can buy XRP. Here, the markets shown are USD and BTC. Since we have deposited USD in Step 4, we will select the USD market.
Bitfinex allows its users to place a limit order for trading crypto. This essentially means that you can set a limit to buy or sell the particular coin when the price hits a certain price. In this case, you can set a limit for a price at which you would like to buy XRP.
All you have to do is enter the price limit in the box below Limit Order and click on Exchange Buy. To put it simply, you have directed the Bitfinex trade platform to exchange your USD fund with XRP when the price of XRP coin hits a certain value. Once the price hits that value, your order will be executed and you can view your funds in your account reports from the top right corner of the homepage.
Congratulations! Now you have successfully completed your first trade with the Bitfinex exchange.
Subscribe to the Bitcoin Market Journal newsletter to receive other tutorials like this one, along with unbiased analysis, tips, and guides for investing in the crypto space.
