
 BitTube is a privacy-inclined blockchain platform that monetizes the streaming or watching of videos. The platform enables users to enjoy video content without the distraction of pop-up ads or any kind of advertisements whatsoever.
The BitYube platform is based on the original Monero blockchain, which is well known in the industry for its focus on the privacy of transactions.
Mining BitTube, like several other newer generation tokens, is a profitable venture if you use the right equipment and follow the right processes. In this post, we will be considering the basic steps that you need to take to have a profitable experience in mining BitTube.
How to Configure GPU Settings
In the mining process, the first thing that you will need to do is to acquire mining hardware (a GPU), connect it to your computer, install the driver, and configure it accurately.
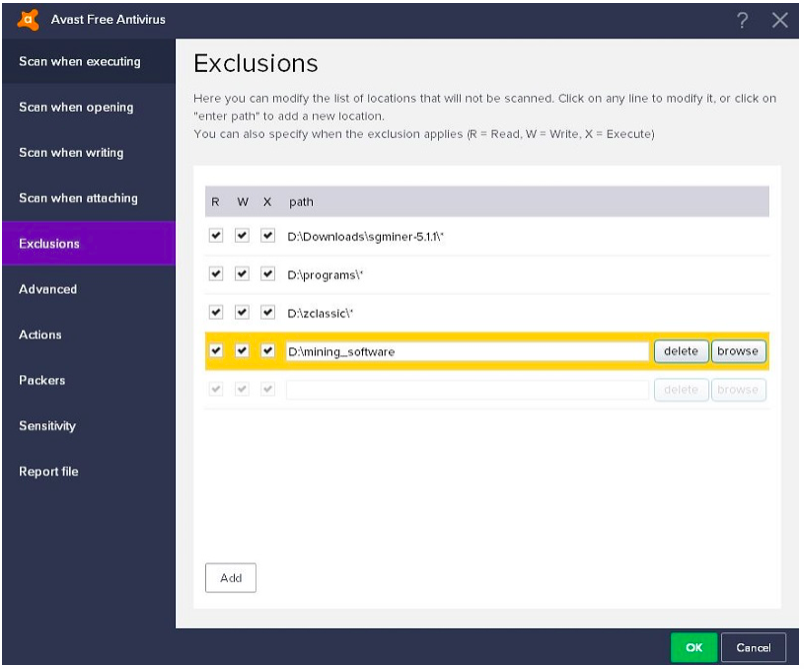
When configuring your GPU driver, it is common to find many antivirus software flagging it as a virus and threat to the computer. Therefore, you may need to exempt this particular software manually so that it will be able to run properly on your computer.
A general way to solve this problem, especially if you are involved in mining multiple coins, is to move all your mining drivers to a particular folder and exclude the entire folder from your antivirus protection. Do this, of course, at your own risk.
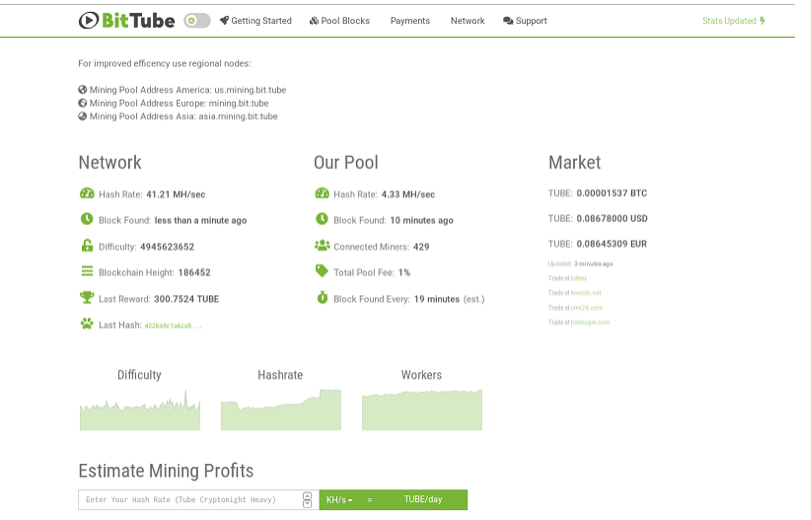
Choose a Mining Pool
Mining can be done independently in what is generally described as solo mining. Results with solo mining are usually low, and it could take several months for you to see any successful results. Joining a pool helps to boost your efforts. Because of the increased mining power of a pool, conquering blocks and gaining coin becomes easier.
Small fees are usually charged to participate in mining pools, mostly about one percent of returns. It is okay to use the platform’s official mining tool https://mining.bit.tube/ or any other pool that may suit your preference.
When you have joined the pool, then you can connect to any port of your choice.
Configure Your Mining Software
The xmr-stak is open source and is the most customizable. The software is suitable for CPU, GPU–Nvidia and GPU–AMD mining rigs. Here is a link to download the software: https://github.com/fireice-uk/xmr-stak/releases.
Install and run the software. What you will be presented with on your screen is two windows that look like this:
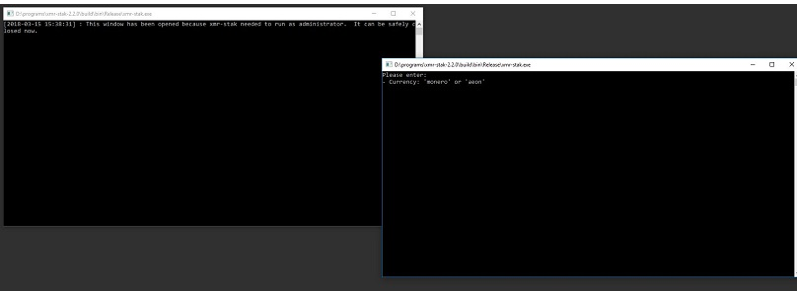
You may choose to close the one that offers admin privileges and continue with the other. Follow the steps that follow and complete the initialization process. Afterward, you will need to identify the particular port that you will want to remotely monitor and type it into the appropriate space available.
This will provide you with a window where you can view and monitor the performance of your mining exercise.
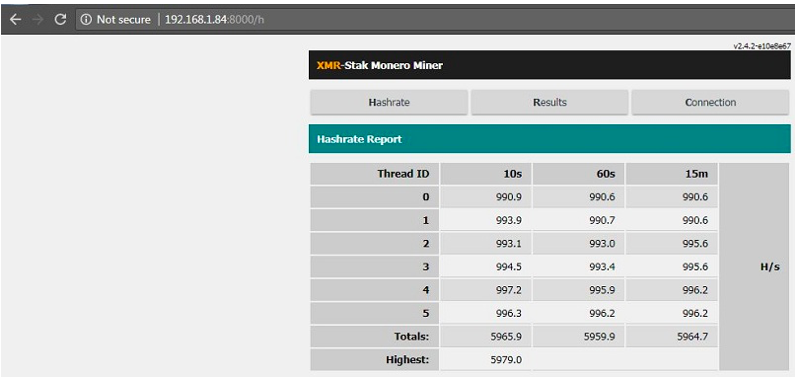
At this point, your software is set and ready to start mining. All you need to do is to follow the steps provided to configure the pool that you have chosen from earlier steps, configure accurately, and you are set to receive BitTube coins.
To learn more about mining altcoins and investing in the digital currency space, take a moment to subscribe to the Bitcoin Market Journal newsletter today.
